It's time for another edition of Weekend Treats. This week, I'll be showing my appreciation for the crafters that make books and reading accessories on Misi.
I'm a keen reader myself, and I have a particular fondness for beautiful, handbound diaries, so I was delighted to discover just how much beautiful stuff there is available right now.
First up for us to drool over is ElenaChiesa with her beautiful, quirky handbound journals.
I love the fun prints and bright colours, and the books look really well made, too. The cover prints are taken from vintage children's books, and I really love the images chosen. This would make a great journal for a younger person, or for someone with eclectic tastes.
Next up, we have nofuzzyedges, whose handfelted goods include covered diaries and bookmarks.
I really love the colours in this bookmark set. The simple patterns and shapes come together to make a lovely landscape. The set makes these a great purchase for someone like me, who might have several books on the go at once, or for a student who may need to mark a number of pages in a textbook during research or study.
I just have to share Sockhorror's unexpected offerings with you.
As a comics and novels fan, and particularly a lover of small, independent comic artists and writers, I was absolutely delighted when I discovered Sockhorror's shop. Here we have an independent writer producing their own novels. It's a risky game, and getting people to hear about your work without the aid of an agent can be difficult, but Sockhorror has found a fantastic way of making it work. The covers are eye catching and well made, and the story intriques me.
Well I'm not quite sure how to top a find like that, so I'll leave you for now. But stay tuned for more updates. Some lovely new soaps will be available very soon!
Saturday, 21 May 2011
Thursday, 19 May 2011
First, let me apologise for the radio silence this past week or so. I've been visiting family, getting in some good cuddle time with relatives I don't see nearly often enough, and beavering away at various crafts.
Currently working on a few projects at home. Feeling inspired after my shisha embroidery tutorial, and having found the most gorgeous beads and threads, I've been making a few rather lovely things.
I hope you can see the details. The finished item in red and gold is a proper little glass mirror shisha'd on in gold thread, surrounded by two rows of red beads, some red satin stitch embroidery and some gold french knots, then afixed to a piece of faux leather backing in more red embroidery. I'm thinking it's make a lovely brooch, or a pin I could use multipurpose. The unfinished work still in the hoop is going to end up a fair bit bigger; possibly a little too big for a brooch, so I might keep it in the hoop as a wall decoration. Or maybe turn it into the main feature of a handmade bag. What do you think?
I've been doing a fair bit of stranded knitting, as well. I love the technique, and my work above using this gorgeous shawl pattern will hopefully become the front of a nice little cushion cover.
I've also been busy working on some more lovely things for the Misi shop A batch of green tea soap and a batch of spring floral soap are currently curing on the shelves, but in the meantime, why not treat yourself to some light, floral moisturiser?
That's all for now, but I'll be back again real soon with more news, more items and, soon, a fantastic special offer!
Currently working on a few projects at home. Feeling inspired after my shisha embroidery tutorial, and having found the most gorgeous beads and threads, I've been making a few rather lovely things.
I hope you can see the details. The finished item in red and gold is a proper little glass mirror shisha'd on in gold thread, surrounded by two rows of red beads, some red satin stitch embroidery and some gold french knots, then afixed to a piece of faux leather backing in more red embroidery. I'm thinking it's make a lovely brooch, or a pin I could use multipurpose. The unfinished work still in the hoop is going to end up a fair bit bigger; possibly a little too big for a brooch, so I might keep it in the hoop as a wall decoration. Or maybe turn it into the main feature of a handmade bag. What do you think?
I've been doing a fair bit of stranded knitting, as well. I love the technique, and my work above using this gorgeous shawl pattern will hopefully become the front of a nice little cushion cover.
I've also been busy working on some more lovely things for the Misi shop A batch of green tea soap and a batch of spring floral soap are currently curing on the shelves, but in the meantime, why not treat yourself to some light, floral moisturiser?
That's all for now, but I'll be back again real soon with more news, more items and, soon, a fantastic special offer!
Thursday, 12 May 2011
Ah I suck, sorry
My apologies for the lack of updates this week. In fun, exciting typical times, three batches of soap failed to set so far! I had hoped to have some lovely new items up for you by the time I went away, but I'm afraid this may not happen.
I will be visiting family for the next few days, but will resume posting as soon as I return!
Saturday, 7 May 2011
Weekend Treats, Pagan Edition
I have been a busy bunny, this week. I am currently knitting up some front panels for cushion covers to help brighten up the house a little, and have been drafted in to make some cross-stitch samplers for Regretsy's charity auction!
I'm still busy with my soaps too, though, and have a whole new batch of supplies on order so I can bring even more yummy things out.
This week, I decided to do some Misi browsing closer to my heart, and wow, was I in for a treat!
There is a wealth of beautiful items for sale on Misi for people with a Pagan leaning. I did find that, in order to get a full glimpse of the options available, I had to make a number of searches using different terms, such as Pagan, Heathen, Wicca, Celtic and so on, but it was well worth the effort!
So without further ado, here is Weekend Treats, Pagan Edition.
First up is some simply stunning textile art from Hoptoitcraftshop. I love art quilting. At it's best it combines colour, texture and form as neatly as a painted canvas. This standing stone textile piece has an ethereal quality and the colours are simply gorgeous.
Next up is GreekArt's gorgeous celtic-themed puzzle box. Actually, after finding this shop I was tempted to delay the Pagan theme this week and just fill the page with items from GreekArt's shop. It is full of amazing, intricate wooden items. But this box was just too cute to resist, with the pretty celtic knotwork pattern.
Gelertdesign offers some very pretty household decorations with Celtic knotwork featuring heavily in the designs, as well as tealight holders and cute fairy doors.
I really like the wall plaques though; they would be equally nice as a wall decoration or as part of a shrine area.
I'm still busy with my soaps too, though, and have a whole new batch of supplies on order so I can bring even more yummy things out.
This week, I decided to do some Misi browsing closer to my heart, and wow, was I in for a treat!
There is a wealth of beautiful items for sale on Misi for people with a Pagan leaning. I did find that, in order to get a full glimpse of the options available, I had to make a number of searches using different terms, such as Pagan, Heathen, Wicca, Celtic and so on, but it was well worth the effort!
So without further ado, here is Weekend Treats, Pagan Edition.
First up is some simply stunning textile art from Hoptoitcraftshop. I love art quilting. At it's best it combines colour, texture and form as neatly as a painted canvas. This standing stone textile piece has an ethereal quality and the colours are simply gorgeous.
Next up is GreekArt's gorgeous celtic-themed puzzle box. Actually, after finding this shop I was tempted to delay the Pagan theme this week and just fill the page with items from GreekArt's shop. It is full of amazing, intricate wooden items. But this box was just too cute to resist, with the pretty celtic knotwork pattern.
Gelertdesign offers some very pretty household decorations with Celtic knotwork featuring heavily in the designs, as well as tealight holders and cute fairy doors.
I really like the wall plaques though; they would be equally nice as a wall decoration or as part of a shrine area.
Tuesday, 3 May 2011
Tuesday Tutorials; Shisha Embroidery Stitches
I love embroidery. It is such a simple way to add something unique to an item of clothing, to decorate something for the house or even just as a means of doodling. There are hundreds of different stitches and techniques, and combining several onto a single piece can result in fantastic textured pieces.
One of the techniques I especially love is shisha embroidery. You may not recognise the term, but you'll have seen the work. Shisha is the term used most commonly for the little mirrors and coins you sometimes see worked into clothing and accessories. The Wikipedia article explains the origins of Shisha;
The best things about shisha, aside from the beautiful finish it gives to work, are that it is surprisingly quick and easy to do, and very easy to cover up mistakes! This makes shisha work a fantastic option for people like me, who love embroidery but aren't terribly good at it!
To start with, you will need the following items;
As you can see, I have already added a few pieces of shisha to my fabric. One is incomplete. I must apologise for the quality of the photos; my hands were shaking more than I realised, and by the time I noticed the good light had faded making it impossible to obtain better ones.
To begin, select an item to shisha and place it on the fabric. First, make four quick stitches across the item as shown above, to hold it down. Notice that the stitches cut right across the sequin, rather than skirting the edges. This is important. If you make the stitches to close to the edge of the sequin, then later when you're filling in the shisha they will pull apart too far and will not be able to hold the coin securely.
Next, add four further stitches at 45 degree angles to the first four, starting from the same points, as shown;
If you added these stitches correctly they should form a rough eight-pointed star. Don't worry too much if they are a little off, or a little wonky. That will all disappear as you finish the embroidery. The most important thing is providing a strong foundation of stitches that overlap each other, and an eight-pointed star is simply an easy way to do this.
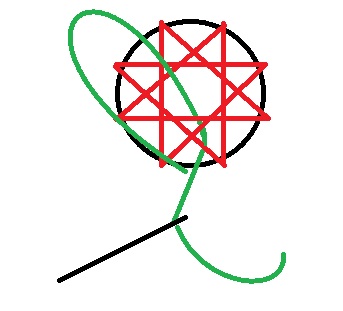
Now we are ready to get started on the main point of the embroidery. Bring your threaded needle out through the fabric next to the coin. You may have difficulty seeing in the photo above, but I want to emphasise that I did not bring the needle out right against the coin, but about 2-3 millimetres away from it. You can do it further away, and you may even like to draw a circle border around the coin in tailor's chalk to help you, but I would not recommend getting too close to the coin.
This photo came out very poorly, so I have included a very professional windows paint-based diagram below!
Slip the needle under the foundation stitches, coming out just to the right of where the thread came through the fabric,
Give the thread a very gentle tug down. You don't wat to pull it tight, just enough to tug the foundation stitches down a tiny bit. Next, lift the thread up to the left out of the way. Insert the needle next to where the thread came out, just to the right.
Bring the needle out just to the left of the stitch, running it over the thread .
As you pull the thread through, you will see that this forms a loop, securing the stitch in position.
It also leaves us in the perfect position for the next stitch. Note that we are working clockwise around the sequin.
Again, run the needle under the foundation stitches, but over the thread. Repeat as with the previous stitch.
Continue around the sequin, remembering not to pull the stitches too tight.
If you run short of thread before the end, don't worry. This is very easy to deal with without breaking up the look of the work.

Complete the last stitch as normal.
When you would normally start the next stitch, instead simple run the needle through the fabric to the back to hold the last stitch in place, and knot it at the back. Then, simply rethread the needle with new thread and continue at that point.
When you reach the end of the work, finish it in the same way that you finished the end of the last thread above.
One thing you may notice is that my stitches are quite far apart. There is nothing wrong with this practically, but aesthetically you may want a neater appearance.
Ordinarily I would fix gaps in the same colour thread as I started, but given the quality of these photos I felt a contrasting thread would be clearer. Thread your needle and pull it up through to the front of the fabric between two existing stitches, where the gap you want to fill is.
As before, run the needle under the foundation stitches, taking care to keep it between the stitches either side of it (you don't want it to overlap one of them). However, instead of making a knot, just push it straight back through the fabric very close to the point you started as possible,
The stitch fills in the gap giving a neater appearance, and the existing knots around the edge conceal the fact that this is a fixer stitch. After using a contrasting colour above, I decided to fill in all the gaps on the work the same way, and then I decided to use the contrast to make a neat variation on the shisha work.
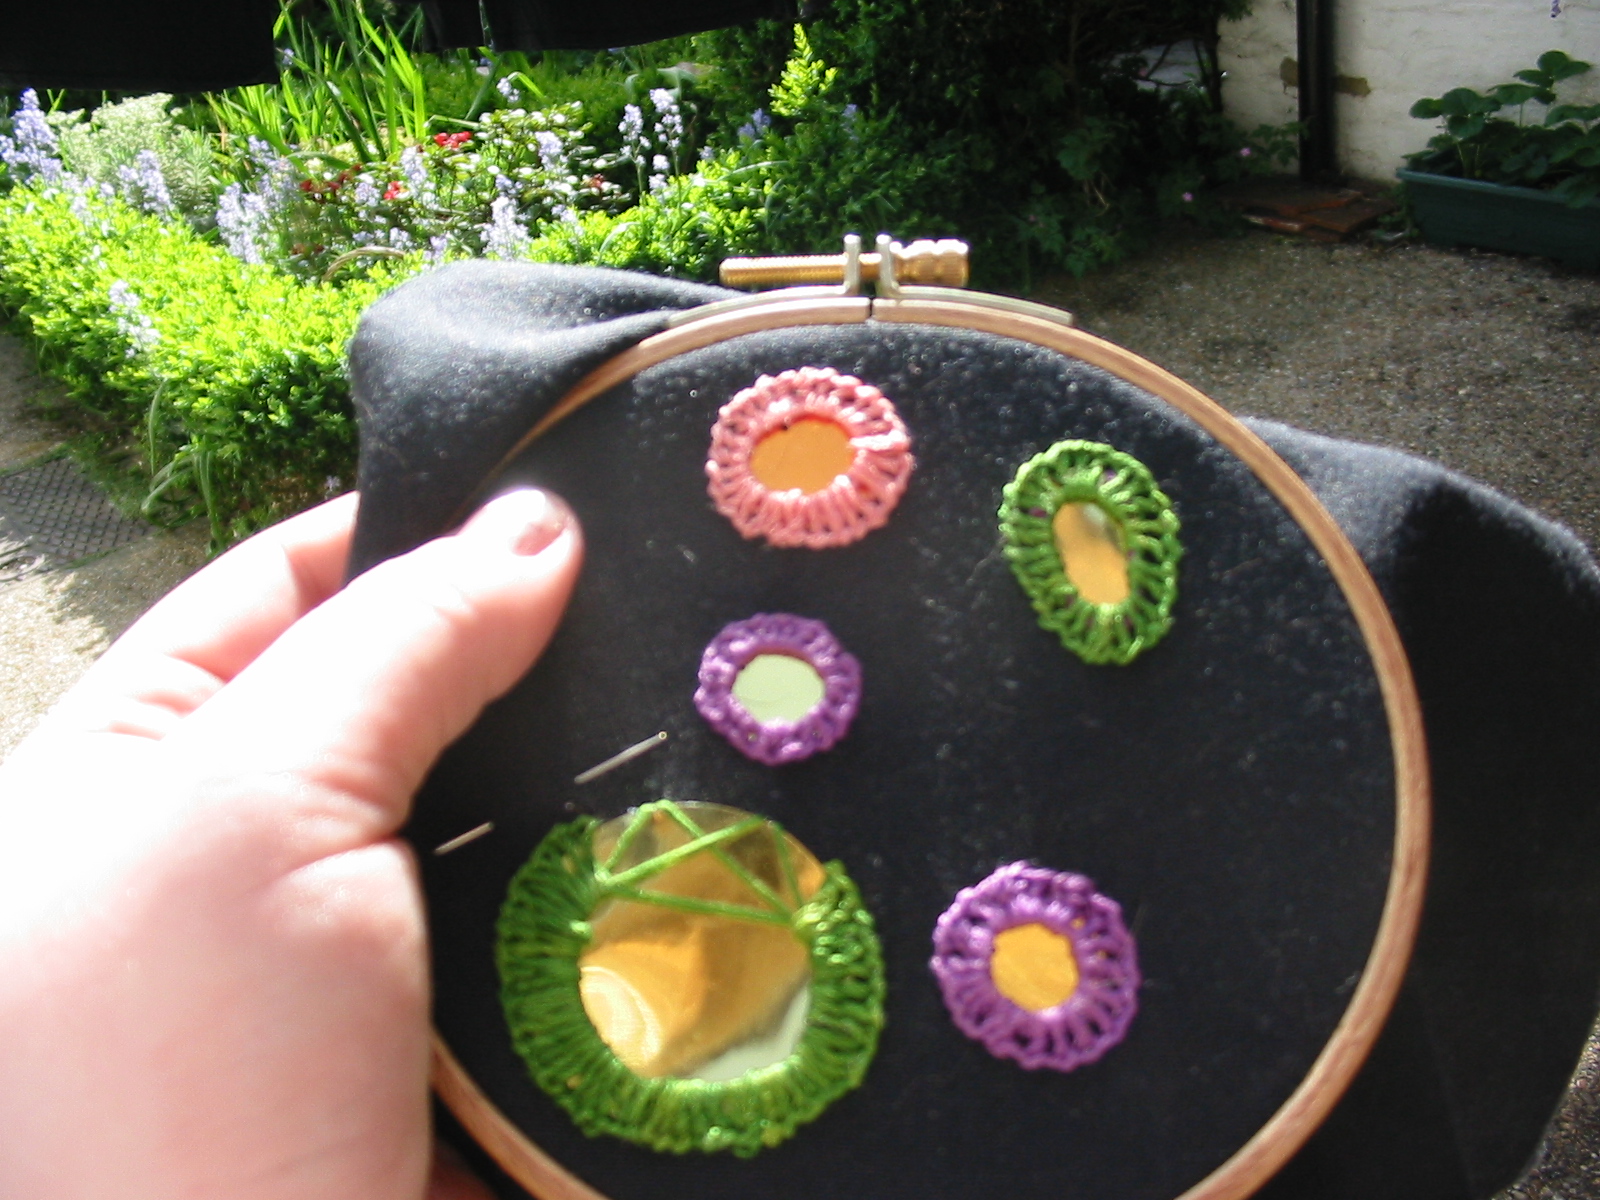
Isn't that nifty? The contrasting thread run in between each of the main colour threads gives a slightly different appearance to the usual look. Actually, I habitually fill in any gaps at the end of shisha with a matching thread anyway, because I find it looks more professional and makes the work "pop" a bit more, too. That is one of the really great things about shisha; fixing mistakes is really simple. Look at the next piece of work;
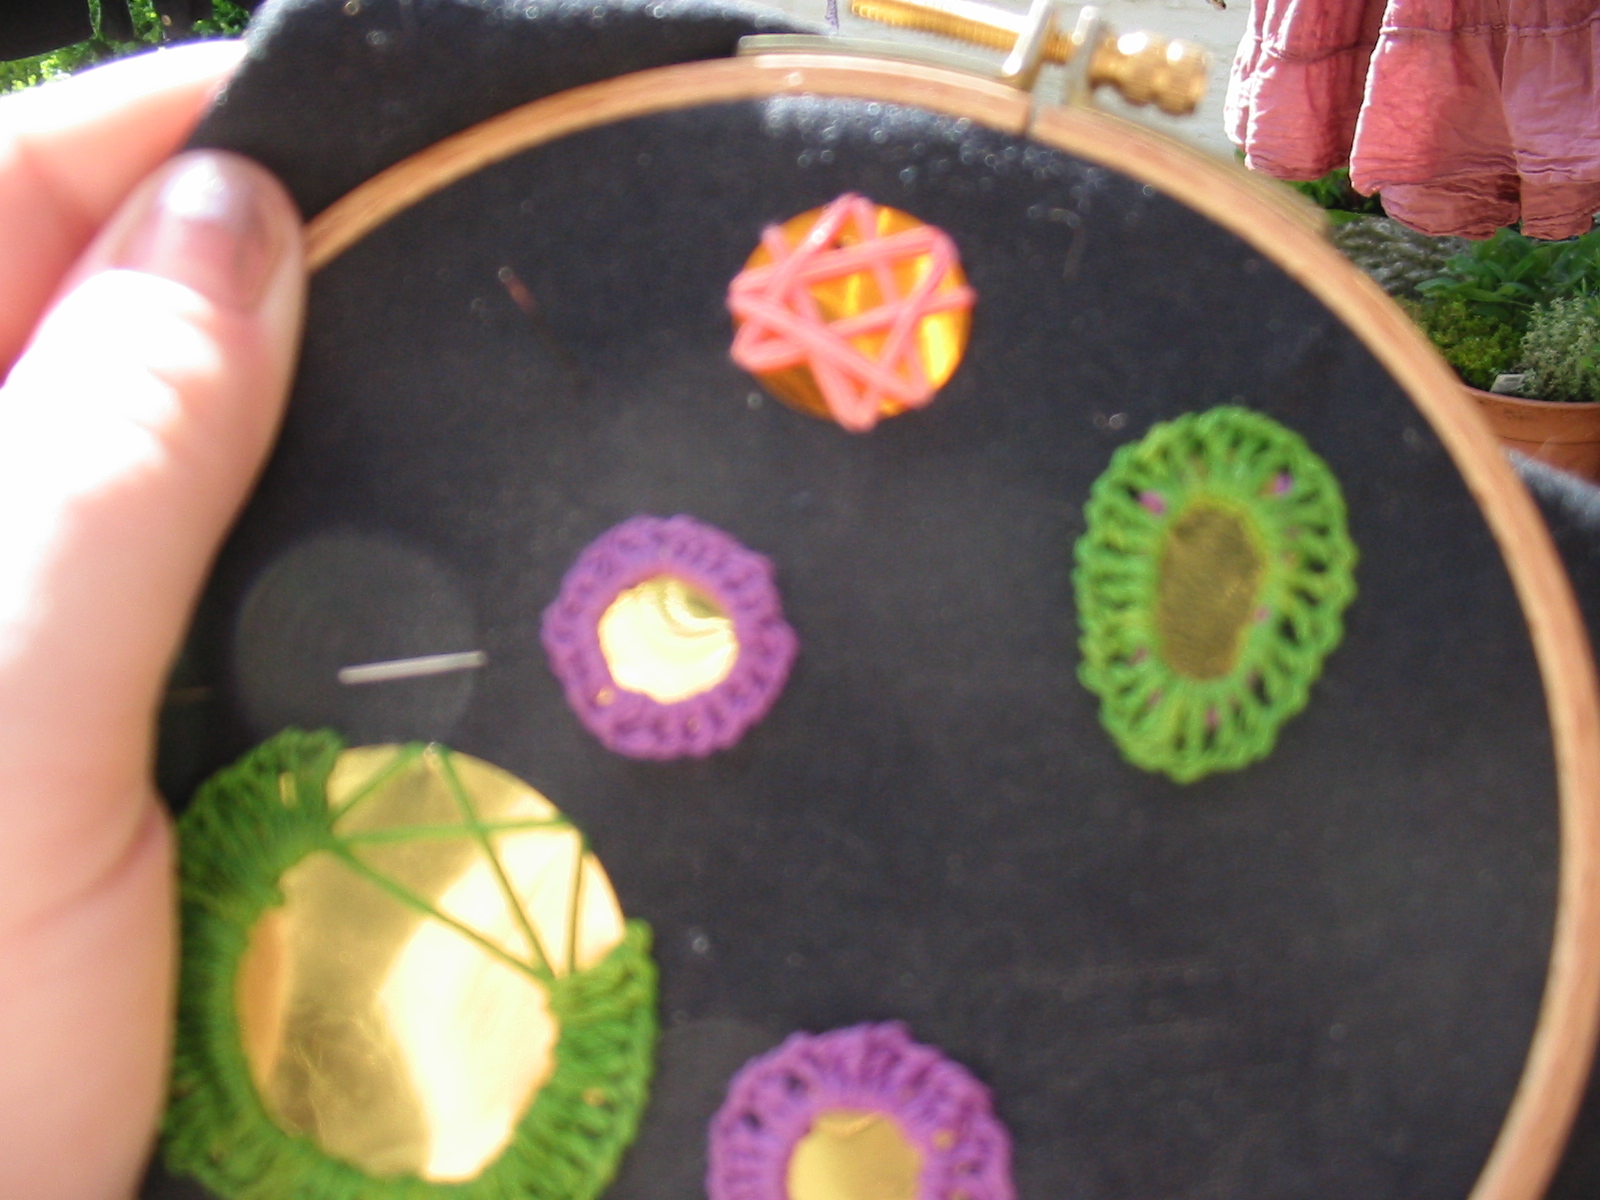
I didn't have time to do any more work on this piece today, (excuse the laundry hanging in the background!), but I eventually plan to add more work in other colours to the outside before cutting the piece out of the frame to make a patch. It looks neat, doesn't it? And pretty opulent with the purple thread between pale gold thread and a gold sequin. Want to see what it looked like before I neatened it up?
I made a lot of mistakes on the work at first. My knot border was uneven, some stitches were pulled too tight which made the stitches wonky and widened the gaps between stitches. I also rushed the work, leaving much larger gaps than I ordinarily would. In the end I went back around the shisha with the main colour thread about 2 more times filling in all the gaps and evening the shape, and then I used a pale gold chainstitch border to conceal the problems along the outer edge. All in all, the work took about 30 minutes, with about 10 of those being spent fixing my mistakes.
So there you go! Now you know the basics of shisha, why not mix it up a bit? Try using only 5-6 foundation stitches, or maybe 10 or 12, and see how that effects the final appearance. Work between the main colour with 2 more contrasting colours, add a thick satin stitch edge or try just running shisha around part of the coin, leaving gaps where no shisha or foundation stitches exist.
Check out Flickr for some fantastic variations on shisha by other artists. You're sure to find inspiration!
Here are some favourites I found made by other people


http://www.flickr.com/photos/pennynickels/4253772391/


Have fun!
And if you do give it a go, I'd love to see some examples of what you end up with. Why not share links in the comments?
One of the techniques I especially love is shisha embroidery. You may not recognise the term, but you'll have seen the work. Shisha is the term used most commonly for the little mirrors and coins you sometimes see worked into clothing and accessories. The Wikipedia article explains the origins of Shisha;
The term "shisheh" means glass in Persian, from where the word transferred to Urdu/Hindi and other related languages. Shisheh embroidery was brought to India by the PersianateMoghul Dynasty and is now most common on the Indian subcontinent, especially in parts of Gujarat, Rajasthan, Haryana and Delhi. This type of embroidery lends a sparkling appearance to the brightly-colored clothes worn in the region, and is very popular for use on clothing, hangings, and domestic textiles.
The best things about shisha, aside from the beautiful finish it gives to work, are that it is surprisingly quick and easy to do, and very easy to cover up mistakes! This makes shisha work a fantastic option for people like me, who love embroidery but aren't terribly good at it!
To start with, you will need the following items;
- Embroidery thread in various colours
- One pair sharp scissors
- Various sized embroidery and/or sewing needles
- Items to shisha such as mirrored glass pieces, large sequins, coins, shells etc
- One embroidery hoop
- Fabric, preferably not stretchy
I would stress that, especially if you have never worked in shisha before, it is best to use a simple, non-stretchy fabric like cotton, cotton drill or canvas. I would recommend that for any embroidery to be honest. If you want to get me in a bad mood, nothing works faster than making me embroider on jersey!
To begin, select an item to shisha and place it on the fabric. First, make four quick stitches across the item as shown above, to hold it down. Notice that the stitches cut right across the sequin, rather than skirting the edges. This is important. If you make the stitches to close to the edge of the sequin, then later when you're filling in the shisha they will pull apart too far and will not be able to hold the coin securely.
Next, add four further stitches at 45 degree angles to the first four, starting from the same points, as shown;
If you added these stitches correctly they should form a rough eight-pointed star. Don't worry too much if they are a little off, or a little wonky. That will all disappear as you finish the embroidery. The most important thing is providing a strong foundation of stitches that overlap each other, and an eight-pointed star is simply an easy way to do this.
Now we are ready to get started on the main point of the embroidery. Bring your threaded needle out through the fabric next to the coin. You may have difficulty seeing in the photo above, but I want to emphasise that I did not bring the needle out right against the coin, but about 2-3 millimetres away from it. You can do it further away, and you may even like to draw a circle border around the coin in tailor's chalk to help you, but I would not recommend getting too close to the coin.
This photo came out very poorly, so I have included a very professional windows paint-based diagram below!
Slip the needle under the foundation stitches, coming out just to the right of where the thread came through the fabric,
Give the thread a very gentle tug down. You don't wat to pull it tight, just enough to tug the foundation stitches down a tiny bit. Next, lift the thread up to the left out of the way. Insert the needle next to where the thread came out, just to the right.
Bring the needle out just to the left of the stitch, running it over the thread .
As you pull the thread through, you will see that this forms a loop, securing the stitch in position.
It also leaves us in the perfect position for the next stitch. Note that we are working clockwise around the sequin.
Again, run the needle under the foundation stitches, but over the thread. Repeat as with the previous stitch.
Continue around the sequin, remembering not to pull the stitches too tight.
If you run short of thread before the end, don't worry. This is very easy to deal with without breaking up the look of the work.
Complete the last stitch as normal.
When you would normally start the next stitch, instead simple run the needle through the fabric to the back to hold the last stitch in place, and knot it at the back. Then, simply rethread the needle with new thread and continue at that point.
When you reach the end of the work, finish it in the same way that you finished the end of the last thread above.
One thing you may notice is that my stitches are quite far apart. There is nothing wrong with this practically, but aesthetically you may want a neater appearance.
Ordinarily I would fix gaps in the same colour thread as I started, but given the quality of these photos I felt a contrasting thread would be clearer. Thread your needle and pull it up through to the front of the fabric between two existing stitches, where the gap you want to fill is.
As before, run the needle under the foundation stitches, taking care to keep it between the stitches either side of it (you don't want it to overlap one of them). However, instead of making a knot, just push it straight back through the fabric very close to the point you started as possible,
The stitch fills in the gap giving a neater appearance, and the existing knots around the edge conceal the fact that this is a fixer stitch. After using a contrasting colour above, I decided to fill in all the gaps on the work the same way, and then I decided to use the contrast to make a neat variation on the shisha work.
Isn't that nifty? The contrasting thread run in between each of the main colour threads gives a slightly different appearance to the usual look. Actually, I habitually fill in any gaps at the end of shisha with a matching thread anyway, because I find it looks more professional and makes the work "pop" a bit more, too. That is one of the really great things about shisha; fixing mistakes is really simple. Look at the next piece of work;
I didn't have time to do any more work on this piece today, (excuse the laundry hanging in the background!), but I eventually plan to add more work in other colours to the outside before cutting the piece out of the frame to make a patch. It looks neat, doesn't it? And pretty opulent with the purple thread between pale gold thread and a gold sequin. Want to see what it looked like before I neatened it up?
I made a lot of mistakes on the work at first. My knot border was uneven, some stitches were pulled too tight which made the stitches wonky and widened the gaps between stitches. I also rushed the work, leaving much larger gaps than I ordinarily would. In the end I went back around the shisha with the main colour thread about 2 more times filling in all the gaps and evening the shape, and then I used a pale gold chainstitch border to conceal the problems along the outer edge. All in all, the work took about 30 minutes, with about 10 of those being spent fixing my mistakes.
So there you go! Now you know the basics of shisha, why not mix it up a bit? Try using only 5-6 foundation stitches, or maybe 10 or 12, and see how that effects the final appearance. Work between the main colour with 2 more contrasting colours, add a thick satin stitch edge or try just running shisha around part of the coin, leaving gaps where no shisha or foundation stitches exist.
Check out Flickr for some fantastic variations on shisha by other artists. You're sure to find inspiration!
Here are some favourites I found made by other people
http://www.flickr.com/photos/pennynickels/4253772391/
Have fun!
And if you do give it a go, I'd love to see some examples of what you end up with. Why not share links in the comments?
I now have a sister shop on Artfire!
Just a little spot to help highlight my work, but for those of you who prefer to use Artfire over Misi, come check me out here!
Sunday, 1 May 2011
PRIZE DRAW IMMINENT!
UPDATE!
The winner has been chosen!
Congratulations, Rachel, your gift will be with you soon!
Subscribe to:
Posts (Atom)